Watermark settings
AfterShot Pro offers watermark settings that let you customize your watermark, while ensuring that you can control how the watermark is placed and sized on a variety on image sizes and orientations.
You can create an image-based watermark or a text-based watermark.
Adding titles and captions
The text capabilities in the Watermark section can also be used to add a title or caption to your photos.
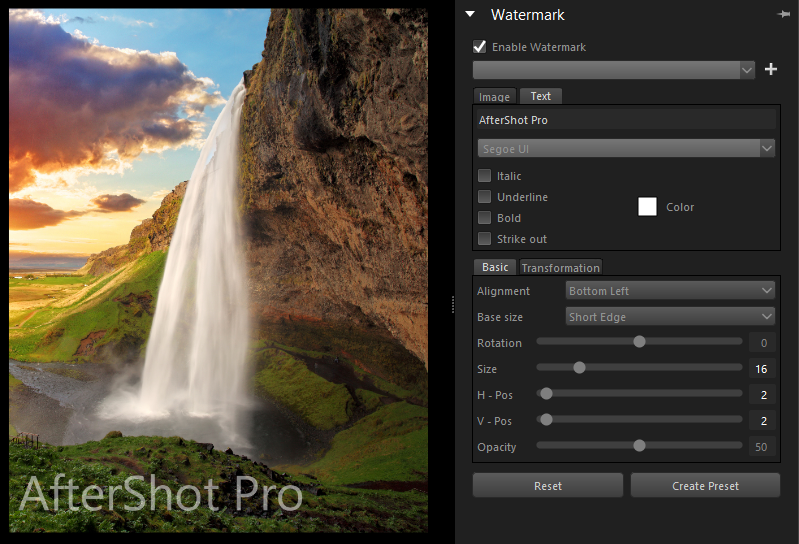
The Watermark section offers many controls that let you customize your watermark
Basic settings
The Basic tab in the Watermark section lets you adjust the following settings:
• Alignment — determines where the watermark will be placed on the image
• Base size — the reference point for the Size of the watermark. For example, if you save the watermark and apply it to a batch of images that are different dimensions and orientations (portrait and landscape), the base size is used to ensure the watermark is the same relative size on each image.
• Rotation — rotates the watermark by up to 90 degrees clockwise or counterclockwise.
• Size — the size of the watermark as a percentage of the reference point set in Base size (maximum is 80% of full image)
• H-Pos — distance of watermark from the left or right edge, as a percentage of the total width
• V-Pos — distance of watermark from the top or bottom edge as a percentage of the total height
• Opacity — transparency level of watermark (percentage)
Transformation settings
The Transformation tab in the Watermark section lets you adjust the following settings:
• H-Skew — skews the watermark horizontally
• V-Skew — skews the watermark vertically
• H-Project — horizontal 3D style transformation (result appears as though watermark is spinning towards you or away from you)
• V-Project — vertical 3D style transformation (result appears as though the watermark is leaning forward or back)
• H-Stretch — stretches the watermark horizontally
• V-Stretch — stretches the watermark vertically
Text settings
When you add text to your image using the Watermark feature, you can adjust the following settings:
• Font — Click the arrow to the right of the font drop-list to choose a font
• Italic, Underline, Bold, Strike out formatting — Enable the check boxes to choose one or more of these text formatting options
• Color — Click the swatch to open the Select Color dialog box and choose a color for your text
To add a watermark to an image
1 In the Tools panel on the right, click the Watermark tab to open the Watermark section.
2 Mark the Enable Watermark check box.
3 Choose one of the following:
• To use an image, click Image, and click the Browse button to choose a PNG or SVG file (usually the file will be a logo with a transparent background). Adjust the settings you want on the Basic tab.
• To add text, click Text, and choose the settings you want on the Basic tab.
If you want to customize your watermark further, click the Transformation tab to skew, project, or stretch the watermark.
4 To save your watermark for future use, click the Save watermark button (plus sign) near the top of the Watermark section.
Tip: You can also use a JPEG for a watermark if you don’t have any transparent areas in your source image.