Working with Presets
Using presets is a great way to speed up your workflow. You can save your favorite adjustments to presets, create keyword presets, or combine a range of photo editing in a preset that can be applied with one click.
Presets are saved as XMP files in the Corel AfterShot Pro user folder on your computer:
C [a main drive]:\Users\[User name]\AppData\Local\Corel\AfterShot Pro\Presets
This makes it easy to copy presets from one computer to another, or to share presets with others.
You can also import Presets by clicking the
Get More tab and installing the presets you want. For more information,
Updating and extending the application.
Applying and managing presets
Applying a preset essentially applies all the commands and information to the selected files. All the actions appear in the History palette, making it easy to remove any settings that cause an undesired effect.
Many presets can be applied to an image, and each subsequent preset replaces the settings of previous presets with the settings contained in the last preset.
Corel AfterShot Pro includes quite a few presets, but you are encouraged to create your own presets.
Managing presets
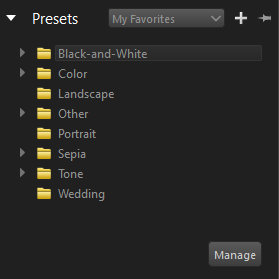
You can manage your presets. When you open the Manage mode, you can create preset folders and move, rename, delete, and view preset settings. Corel AfterShot Pro includes several default presets. You can create as many additional folders as you need to categorize and organize your photos. You can also choose which presets display in the My Favorites list (the drop-down list on the Presets section title bar).
To apply a preset
1 In the Thumbnail panel, select the image or images that you want to edit.
2 In the Tools panel, click the Standard tab.
3 In the Presets section, click a preset in the list. Presets are applied to all selected images, except when in Multi-Image View mode.
To create a preset
1 Edit an image, using all the commands and settings that you want to save to the preset.
2 In the Tools panel, click the Standard tab.
3 In the
Presets section, click the
Add Preset button

.
4 In the Save Presets dialog box, pick a name for the settings, and choose which settings you want to save.
5 Click OK to save the preset. The preset name appears in the preset list immediately.
To access the Manage mode for presets
1 In the Tools panel, click the Standard tab, and open the Presets section.
2 Click the Manage button in the lower right corner of the section.
To add or remove a preset to the My Favorites list
• In the Show in Menu column, mark a check box to display the corresponding preset in the My Favorites drop-down list; unmark the check box to remove the preset from the list.
To create folders for presets
1 In the
Presets Manage mode, click the
Add Folder button

.
2 Double-click the new folder that appears at the bottom of the preset list and type a name for the folder.
To move presets
• In the Presets Manage mode, drag a preset from one folder to another folder.
To rename presets or preset folders
• In the Manage mode, double-click a preset or folder in the list, and type a new name.
To delete presets or preset folders
• In the
Manage mode, click the preset or folder that you want to delete, and click the
Delete button

or press
Delete on your keyboard.
Tip: You can undelete a preset by clicking Edit > Undo or by pressing Ctrl + Z.
To view the settings for a preset
• In the
Manage mode, click the preset and click the
View preset settings button

.