Applying effects : Applying a gradient with the Graduated Filter effect
Applying a gradient with the Graduated Filter effect
You can apply a color gradient to your photos to simulate the effect achieved by using a graduated filter on your camera lens. Graduated filters often consist of a single color that fades to transparent. This lets you adjust the color in a specific area of the photo. For example, in a photo where you want an otherwise too bright sky to have more blue, you can use a blue graduated filter to increase the blue of the sky without affecting the lower part of the photo. If you want to push your creativity, the Graduated Filter effect lets you choose from different gradient shapes and dual-color options.
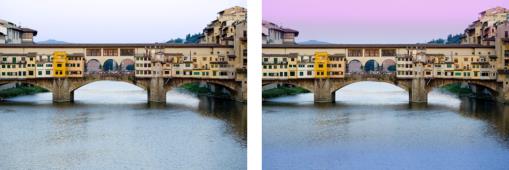
The Graduated Filter effect was applied to the original photo (left) to create a sunset effect and to intensify the blue of the water.
To apply a gradient with the Graduated Filter effect
1 Click EffectsPhoto EffectsGraduated Filter.
The Graduated Filter dialog box appears.
2 Click a Style button to determine the shape of the gradient.
The default option, Linear Graduated Filter, best simulates traditional graduated filters.
3 Drag in the Before pane to set the size and direction of the gradient. A line displays as you drag.
4 In the Preset drop-list, choose a type of blend.
5 In the Color area, click a color swatch to set a color.
If you want to change the direction of the color or transparency, click the Swap Colors button .
6 In the Settings area, adjust any of the following sliders:
• Opacity — specifies the transparency of the colors. Lower values are more transparent.
• Blend — specifies how gradual the color transition is. Higher values produce a softer blend.
• Rotate — specifies the angle of the gradient in degrees.
If you want to fine-tune specific areas of your photo, you can paste your finished version as a layer over the original version. You can then use the Eraser tool to reveal original colors and detail.