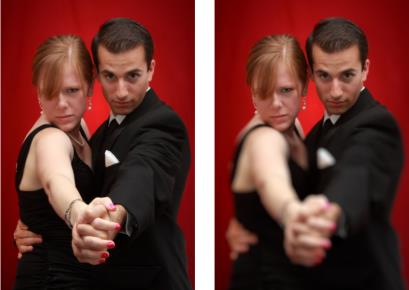
You can control the depth of field to create an area of focus that draws attention to the subject in your photo. For example, in a photo of a person surrounded by a field of flowers, you can defocus (blur) the surrounding flowers while retaining a clear focus on the person.
You can apply the Depth of Field effect to draw attention to the subject in your photo.
In photography, depth of field refers to the area that appears to be in focus. Different factors affect the depth of field, including the distance between the camera and your subject, the lens speed, and your camera’s aperture setting. Most automatic cameras use the smallest aperture setting possible to ensure that most of the image is in focus.
Selecting an area of focus
In Corel PaintShop Pro, you can quickly choose an area of focus by creating a circular or rectangular selection, or you can trace around an area to create an irregularly shaped selection. You can also invert a selection. For more information about selections, see Creating selections.
Adjusting the blurred area
You can control the amount of blur applied to the area outside the selection, and you can adjust the transition between the area in focus and the blurred areas. Corel PaintShop Pro also lets you choose between circular or hexagonal aperture shapes. The aperture shape can affect light patterns that appear in the out-of-focus areas. This effect is called bokeh, and it is most noticeable in small pinpoints of light on a dark background.
To create an area of focus by using the Depth of Field effect
Edit workspace
1 In the Edit workspace, select the area that you want to keep in focus.
3 Move the Blur slider to adjust the amount of blur applied to the out-of-focus area.
You can also
Invert the selected area
Mark the Invert check box.
Control the aperture shape for the blurred area
Click one of the following buttons:
• Circular Aperture Shape
• Hexagonal Aperture Shape
Adjust the transition between the area in focus and the blurred area
Move the Feather edge slider. Moving the slider to the right increases the feathering; moving the slider to the left decreases the feathering. Note that a setting of 0 produces a hard, undefined edge, which is probably not what you want. In general, do not set this slider to less than 2 or 3.
Fine-tune the size of the area in focus
Move the Focus range slider to the left to shrink the area in focus. Move the slider to the right to expand the area in focus to the edge of the selection.
If you don’t have a pre-existing selection, you can select an area of focus using any of the selection tools in the Depth of Field dialog box:Circular , Freehand , Rectangular , or Raster Selection .
Make your selection slightly larger than the area you want to keep in focus, and then fine-tune the edge of the selection by using the Focus range slider.