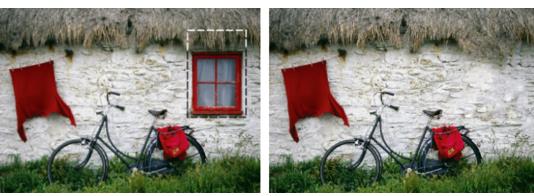
Magic Fill is a content-aware feature that can make unwanted elements of your photos vanish. Use your favorite selection tools to select an area or object that you want to remove and apply Magic Fill to replace the selection with a background that matches the surrounding area—even when the surrounding area is textured or varied. For more information about selections, see Working with selections.
To erase an image area with Magic Fill
1 In the Tools toolbar, choose one of the following selection tools:
• Selection Tool
• Freehand Selection
2 On the Tool Options palette, adjust the settings you want.
3 In the image, select the area that you want to erase. You don’t need to be precise. Magic Fill works best when some of background is included in the selection.
4 On the Tool Options palette, click the Magic Fill button .
The selected area is filled with the color and texture sampled from the background.
If you don’t get the results that you expect the first time, it’s easy to undo the fill and readjust the selection, or simply create a new selection and reapply Magic Fill only to the areas that you want to touch up.