You can view images in a tabbed format, in which a tab appears at the top of the image window. When you click a tab, the image in that window becomes the active image. You can also view images in windows, which you can move, resize, or close. You can open the same image in multiple tabs or image windows, which lets you see the image at different magnification levels.
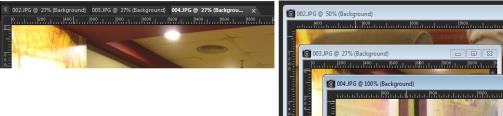
The Tabbed Documents mode (left) lets you maximize your image viewing space. To view several images at the same time (right), turn Tabbed Documents mode off.
If you have multiple images open, you can arrange the image windows to view them side by side or stacked in cascading order. You can also see a list of all open images.
If the image is larger than the image window, you can pan to view different parts of the image, or you can fit the window to the image. You can also see a thumbnail of the entire image in the Overview palette. For more information, see Using palettes.
The title bar at the top of the image window shows the filename and the magnification percentage. An asterisk after the filename indicates that the image has been modified and that those changes have not been saved.
If the image has an embedded watermark, a copyright symbol is displayed in front of its name. For more information, see Using digital watermarks.
To enable or disable the tabbed image window option
Edit workspace
• Choose WindowTabbed Documents.
To view another image, click its tab. If an image tab is not in the current view, click the arrows in the upper-right corner of the image window to scroll left or right.
To close a tabbed-format image, click the Close button .
To move an image window
Edit workspace
• Drag the title bar.
To resize an image window
Edit workspace
• Drag a corner of the image window.
When you resize an image window, you are not changing the size of the image.
To minimize or maximize an image window
Edit workspace
• Perform a task from the following table.
To
Do the following
Minimize the image window to display only the title bar
Click the Minimize button .
Maximize the image window to fill the workspace
Click the Maximize button .
Restore the image window to its previous size
Click the Restore Up button .
To close an image window
Edit workspace
• Choose FileClose.
If you have made unsaved changes to your image, you are prompted to save.
You can also click the Close button on the title bar.
To close all windows, choose WindowClose All.
To make a copy of the active image
Edit workspace
• Choose WindowDuplicate.
A copy of the active image opens. You can edit the copy independently of the original image.
You can also duplicate the active image by pressing Shift + D.
To open multiple views of the same image
Edit workspace
• Choose WindowNew Window.
A new window opens with another view of the active image. When you make changes in one window, both windows are updated.
To arrange multiple windows
Edit workspace
• Perform a task from the following table.
To
Do the following
Display cascading windows
Choose WindowCascade.
The windows cascade from the upper left to the lower right of the workspace.
Display windows side by side vertically
Choose WindowTile Vertically.
Windows are resized to fit within the workspace.
Display windows side by side horizontally
Choose WindowTile Horizontally.
Windows are resized to fit within the workspace.
To see a list of all open images
Edit workspace
• Click the Window menu.
The names of all open images appear at the bottom of the Window menu. The filenames are listed in the order in which they were opened.
To view another area of the image
Edit workspace
• Perform a task from the following table.
To
Do the following
Pan the image
On the Tools toolbar, choose the Pan tool , and then drag in the image. If any other tool is active, hold down the Spacebar, and then drag in the image.
Change the view horizontally or vertically
Drag the horizontal or vertical scroll bar.
Change the view by small increments
Press the arrow keys.
Pan in the Overview palette
Press F9 to display the Overview palette, click the Preview tab, place the pointer inside the panning rectangle, and drag. You can also set the zoom level in the Preview tab of the Overview palette.