Applying a color or transparency gradient with the Gradient Fill tool
The Gradient Fill tool lets you interactively apply a gradient to the canvas, a selection, or shape. You can adjust the colors and gradation as well as the direction, directly in the image window.
By default, the Gradient Fill tool applies the last gradient selected in the Material Properties > Gradient page, and modifies it with the current settings in the Tool Options palette.
You can adjust the overall transparency of a color gradient by creating the gradient on a new layer and adjusting the transparency of the layer. For more information, see Setting layer opacity.
You can also create a transparency gradient to adjust the areas of transparency and opacity for the selected area by creating a mask layer and then applying the Gradient Fill tool.
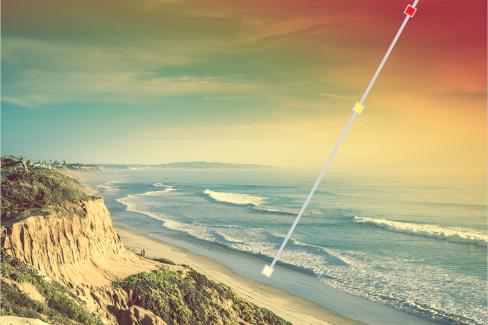
An interactive gradient fill line appears onscreen when you use the Gradient Fill tool.
To apply a color gradient with the Gradient Fill tool
Edit workspace
1 On the Tools toolbar, click the Gradient Fill tool (grouped in a flyout with the Flood Fill tool)
2 In the image window, drag across the canvas, a selection, or an object, to set the gradient line.
Note: By default, the last foreground gradient selected on the Gradient page of the Material Properties dialog box is applied.
If you right-click and drag, the last gradient selected for the background swatch is applied.
3 Do any of the following to customize the gradient:
• To adjust the angle of the gradient, drag the rotation handle .
• To add a color, drag a color swatch from the Materials palette to the gradient line
• To remove a color, drag a swatch away from the gradient line
• To change a color, click a swatch on the gradient line (a blue swatch outline indicates that it is selected), and from the Materials palette, drag a new color swatch to the selected swatch.
• To adjust the transition between colors, drag the swatches along the length of the gradient line
• To change the gradient type or to invert the gradient, adjust the controls on the Tool Options palette.
Note: If you can’t see the end of the gradient line, zoom out.
You can delete, rename, copy, or move a preset text style by clicking the Resource Manager button in the Presets drop-list, clicking a text style in the list, and clicking the corresponding button for the action that you want to perform.
If you want to adjust the overall transparency of the gradient fill, in the Layers palette, you can create a new layer before you apply the gradient fill, and drag the Opacity slider to the desired percentage.
To apply a transparency gradient with the Gradient Fill tool
1 In the Layers palette, select the layer that you want to apply the gradient to, and click New Mask Layer > From Image, choose the Source opacity option, and click OK.
2 On the Tools toolbar, click the Gradient Fill tool (grouped in a flyout with the Flood Fill tool)
3 Drag across the area you want to fill to apply the gradient line.
4 Do any of the following to customize the gradient:
• To adjust the angle of the gradient, drag the rotation handle .
• To add a color (white for opacity; black for transparency), drag a color swatch from the Materials palette to the gradient line
• To remove a color, drag a swatch away from the gradient line
• To adjust the transition between colors, drag the swatches along the length of the gradient line
• To change the gradient type or to invert the gradient, adjust the controls on the Tool Options palette.
Note: If you can’t see the end of the gradient line, zoom out.
 .
. to the desired percentage.
 (grouped in a flyout with the Flood Fill tool)