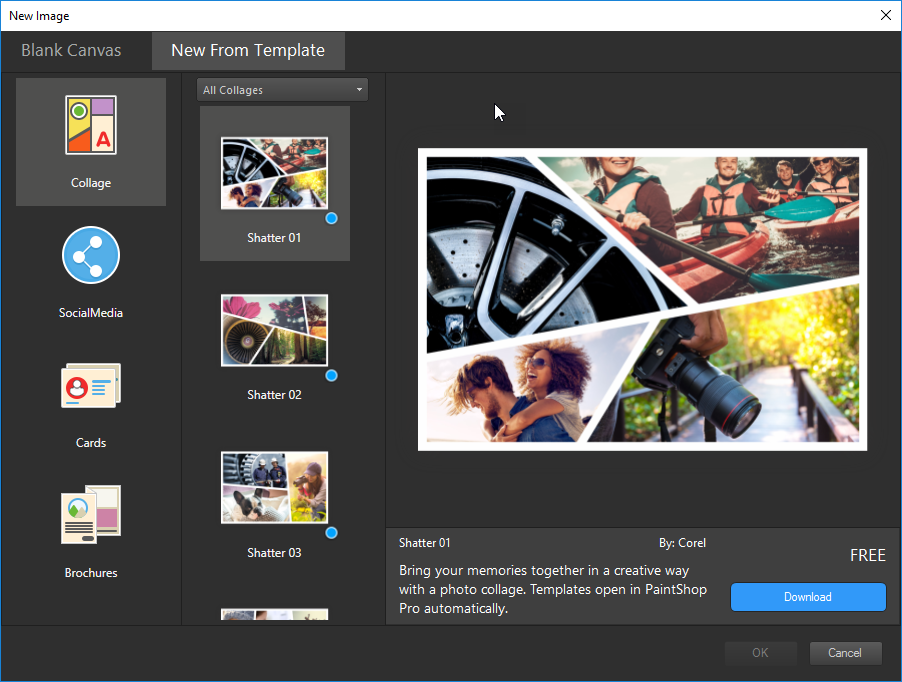
You can access a wide range of creative templates on the New From Template tab in the New Image dialog box—from cards, to collages, brochures, and social media templates. You can choose from a selection of free templates or you can purchase templates.
How the templates work
The templates use PaintShop Pro layers and masks to provide maximum flexibility—you can customize the templates any way you like and save the customizations to a .pspimage file so that you can use them again. The templates use placeholder images that you replace with your own images—all this is done in the Layers palette. For more information about layers, see Working with layers.
To start a project from a template
1 Do one of the following:
• From the Welcome tab, click the Template button.
• From the Edit tab, click File > New From Template.
The New Image dialog box appears with the New From Template page displayed.
2 Choose a template.
If the template isn’t already installed, click Download or Buy.
3 Click OK.
The template opens in the image window and the Layers palette.
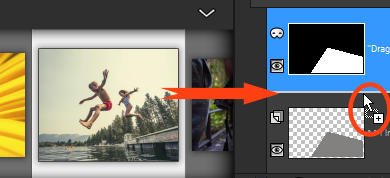
4 In the Organizer palette, select a photo that you think will work well in one of the template frames, and drag the thumbnail to the Layers palette, under the mask layer (the mask layers appear in black and white) for the frame that you want to fill.
It’s important to drag the image thumbnail under the black-and-white mask layer. The pointer displays a plus sign and a line displays between the layers to indicate that you are inserting an image layer.
The image is inserted as a layer and is selected (highlighted in blue).
5 On the Tools toolbar, click the Pick tool .
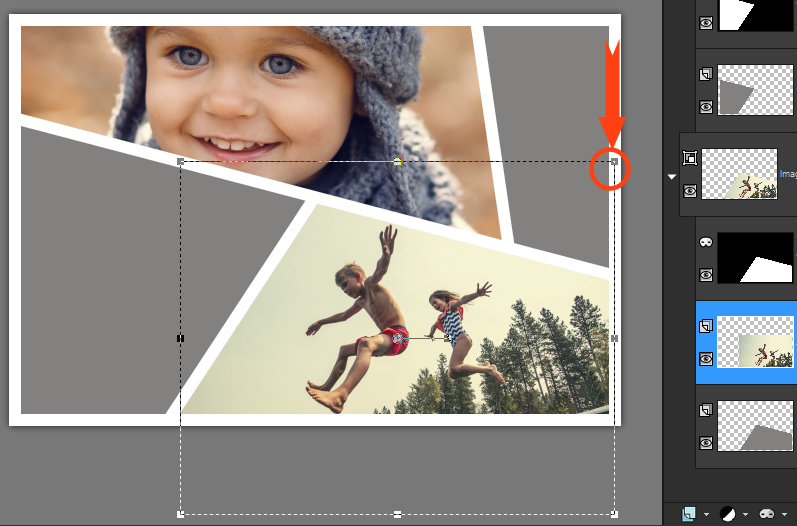
6 In the image window, adjust the zoom level (you can use the Zoom Out tool on the Standard toolbar) until you can see the edges of the image layer if they extend beyond the image window.
A marquee indicates the edges of the image layer. The red arrow and circle show a corner node.
7 Drag a corner node to resize the image layer. You can move the image layer by positioning the cursor in the middle of the image layer (a four-arrow cursor appears), and dragging.
If you want to move the image to a different frame in the template, in the Layers palette, drag the image layer under a different mask layer (might need to scroll in the Layers palette).
8 When you are finished filling the template, make any additional changes you want (add text etc...).
9 Click File > Save As and save the file as a .pspimage file to keep a layered, editable version of the file.
10 If you want to share the final version, click File > Save As, and save the file to a shareable file format, such as JPEG, PNG, or TIFF (for printing). Please note that most file formats flatten the image (merge all layers to one layer).
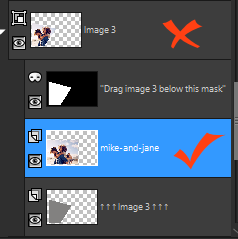
If your image appears clipped and you see the transparency grid when you move or resize the image layer, check to see if the mask group is selected in the Layers palette rather than the image layer. If so, undo until the image is restored and then select the intended layer.
The red x indicates the group layer. The red check mark indicates the image layer. You must select the image layer before you adjust the layer in the image window.