Important! It is recommended that you use correction or special effect filters from the Adjust and Effect menu only. Editing 360° photos outside these menus can effect the 360° data that your photo must retain if you want to share it on a 360° photo viewing site.
Photos captured with 360° cameras can often benefit from a number of common corrections to fix exposure, white balance, sharpness, purple fringe, contrast, and color.
You can also apply effects, such as popular Photo Effects filters: Black and White Film, Sepia Toning, and Retro Lab.
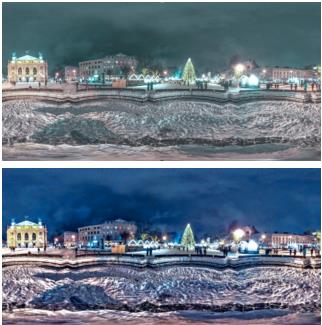
Several color, noise, and exposure filters from the Adjust menu were used to improve the 360° photo.
To apply a correction or effect filter to a 360° photo
1 In PaintShop Pro, open a photo that was captured with a 360° camera.
A message appears that lets you choose between editing in the 360° Photo window and the Adjust or Effect menu on the Edit tab.
2 Click the Adjust/Effects button.
3 From the main Edit tab, choose the filter you want from the Adjust or Effect menu.
4 When you are finished editing the image, it is recommended that you save to a new file name.