Audiobook Creator window
Audiobook Creator enables you to easily convert and transfer an audiobook from an existing audio CD to iTunes, an iPod or other connected portable device, to an audiobook file on hard disk, or to an MP3 disc. Audiobook Creator can also convert public domain MP3 audiobooks that you have downloaded from the Internet.
Note: Audiobook Creator does not convert audiobooks from files that are copy-protected.
The Audiobook Creator task panes on the left-hand side include the following tasks:
n Add Audiobook
n Rip from CD: Select this task button to rip an audiobook from one or more audio CDs. When this task is selected, the Rip tracks from CD dialog opens. This dialog gives you access to several task-specific settings, including one that lets you determine where your files are saved.
n Add files or folders: Select this task button to create an audiobook from audio files on your computer.
Note: Tracks are ripped to a temporary location on your computer and are deleted when the application is closed.
n Output to
n iTunes (must already be installed): Select this option to output your audiobook to iTunes. All tracks will automatically be combined into a single iTunes audiobook file (.m4b) with the following iTunes audiobook features:
n each track will become its own chapter for easy navigation
n pause/resume functionality
n book cover art will be included and will be displayed in iTunes
n iPod/iPhone (must be connected, and iTunes must already be installed): Select this option to output your audiobook to an iPod or iPhone. The following audiobook features will be included:
n each track will become its own chapter for easy navigation
n pause/resume functionality
n book cover art will be included and will be displayed in iTunes
n Other portable device (must be connected): Select this option to output your audiobook to a portable device.
n MP3 disc: Select this option to output your audiobook to MP3 disc. This option is especially useful if your source audiobook is on several CDs, and you want to combine them onto a single disc in compressed format.
Note: MP3 disc playback requires a player that supports this format.
n Output as Playlist: Select this option to output your audiobook to hard disk as a playlist that can be played back on your PC using a standard player, such as Windows Media Player. Or, send the playlist to a portable device at a later time. Audiobook Creator supports the following playlists:
Format output | Description |
.M3U | n Standard audiobook playlist n Many players support chapter skipping since chapters are not merged n Some players do not support pause/resume of playlists when bookmarking is used |
.WPL | n Windows Media Player audiobook playlist n Many players support chapter skipping since chapters are not merged n Some players do not support pause/resume of playlists when bookmarking is used |
.MP3 | n Merged playlist n Chapter skipping is not supported n Most players support pause/resume of single files when bookmarking is used |
The Audiobook Creator window also contains the following features:
n Toolbar
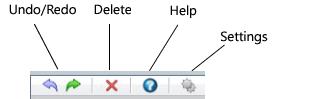
n Undo/Redo: Use these buttons to undo or redo the last action taken.
n Delete: Select the track(s) you want to delete, then click the Delete button.
n Help: Opens the Audiobook Creator help file.
n Settings: Use the Settings dialog to customize preferred audio quality and file format settings. File format is only valid if you output to a playlist, or to a portable device other than an iPod or iPhone. When outputting to iTunes, iPod or iPhone, the file format is automatically converted to iTunes audiobook format (.m4b). When outputting to an MP3 disc, the file format is automatically converted to .mp3.
n Title: Use this text box to edit the audiobook’s title.
n Author: Use this text box to edit the audiobook author’s name.
n Change cover art: Select this option to locate and apply cover art to your audiobook.
n Remove cover art: Select this option to remove the cover art.
Tip: Here’s another way to change cover art: Drag-and-drop image files from your computer desktop to the thumbnail.
Tip: To crop white space around a cover art image, right-click the thumbnail and select Auto crop.
Tip: To delete all tracks in your playlist, click the cover art image, then click the Delete button located on the toolbar.