How to create a project
MyDVD lets you create and customize your project in a number of ways. The basic steps for creating a project are
1 Choose a template or create a custom template (see Designing video disc templates).
2 Add submenus to organize your videos.
3 Add media, renaming your content in the Tree Mode panel.
Optional customizations let you
• Add chapter points to videos (helpful for longer videos).
• Change the background picture used for the menu.
• Edit the menu layout.
• Change the menu background music.
You can save your project (.MyDVD file) so that you can work on it later or output it to a different format.
Before you start
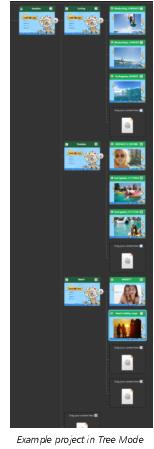 It’s a good idea to think about how you want to organize your media before you create your project. MyDVD uses a tree structure and submenus to organize projects. Let’s take a look at an example project.
Example: I have a quite a few video clips from a weekend trip. For my project, I decide to include the best clips from three different activities. My main menu title will be “Summer Vacation”, and I will create submenus for each activity:
• Surfing (3 video clips)
• Poolside (3 video clips)
• Beach (2 video clips)
In the example, the main menu template I chose from the Theme tab of the Media Browser can accommodate up to four items per menu and submenus follow the same structure. If you have more than four videos for any one group, you can create a substructure that suits the project. In the example described, if there were nine surfing videos, another submenu based on participants could be created: Mom (3 videos), Dad (2 videos) and Kids (4 videos).
Note: Note: Some templates accommodate a maximum of two items per menu, others accommodate three or four items. The number is predetermined, so choose a template that works for your content needs or create a custom template.
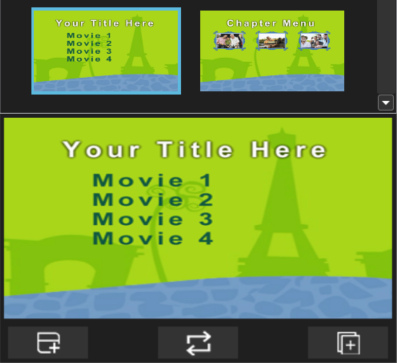
On Theme tab, the thumbnail for main and sub menus displays on the left. The thumbnail on the right is a chapter menu (chapters are often used in longer videos). If you click a thumbnail, a blue outline appears around the selected thumbnail, and the selected menu can be previewed at the bottom of the panel. The template shown above can accommodate up to four items per menu (indicated by Movie 1, Movie 2, Movie 3, Movie 4).