Moving selected areas with Magic Move
Magic Move lets you move part of an image to a new position and automatically fills the remaining empty area so that it matches the surrounding background—even if the background is textured or varied. This content-aware feature works with your favorite selection tools.
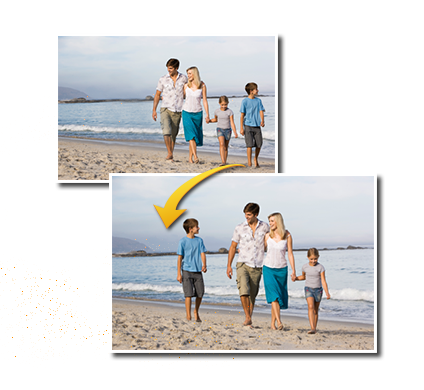
To move a selected area with Magic Move
Note: Adjusting the Feather amount (for example, try a setting of 5-20) can improve how the selection blends into the new background.
3
In the image, select the area that you want to move. You don’t need to be precise. Magic Move works best when some of background is included in the selection.
The remaining empty area is filled with a content-aware fill that matches the surrounding background.
If you don’t get the results that you expect the first time, try these tips: