Changing portrait backgrounds with AI Background Replacement
AI Background Replacement uses artificial intelligence (AI) to select people in portrait and group photos and extract the background so that you can replace it with one of many preset background images or a custom image. For example, you can easily replace a distracting or unwanted background with a studio-style backdrop, a beach scene, a mountain view, or a famous landmark. You can also choose to output your subject with a transparent background.

The original background (left) was replaced with a custom image (right) by using AI Background Replacement.
After you replace the background, the resulting image is output with layers for the subject, the new background, and the original image.
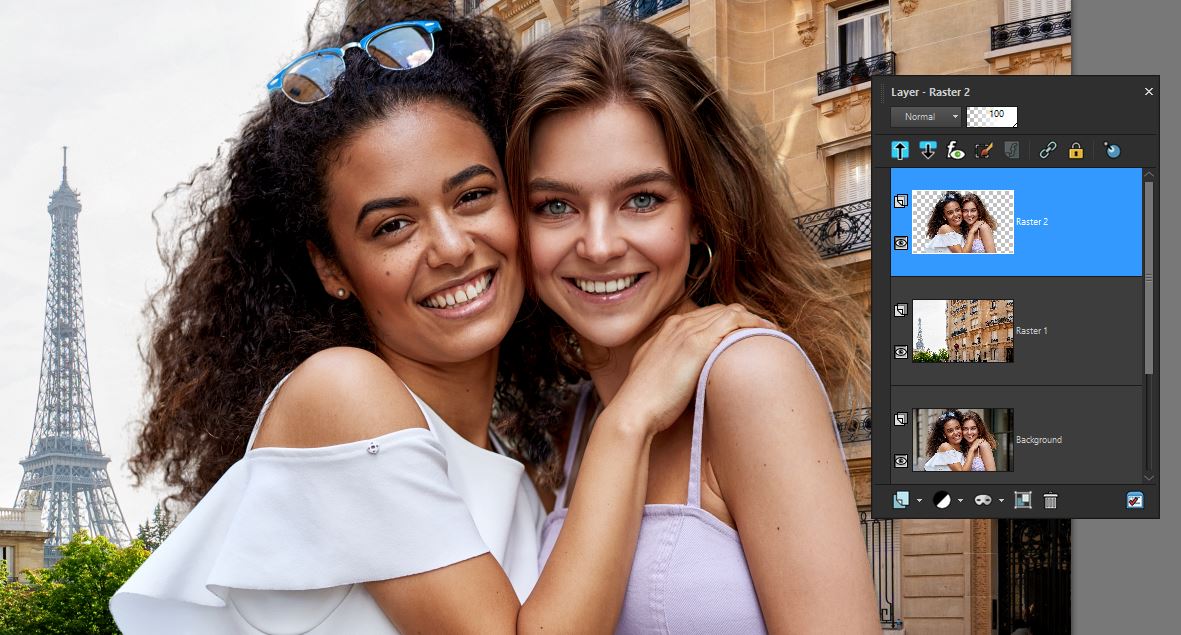
To maintain maximum editability, layers are used for the subject (top layer), the new background (middle layer), and the original image (bottom layer).
Tips for background replacement success
• Choose portrait photos where the subject is fully in the foreground—it is best if no background area is in front of the subject.
• Group photos can be used but results will vary depending on the complexity of the image. It is best if subjects are closely grouped together with few gaps.
• After you output the result, you can apply effect or adjustment filters to the subject layer or background layer to match the color and tone of the layers. For example, select the subject layer, and choose Effects > Photo Effects > Film and Filters to warm, cool, or tint the layer. You can also apply a flattering Glamour effect to your subjects. For more information, see Applying film and filter effects to photos.
1 Open a portrait photo.
2 Click Adjust > Artificial Intelligence > AI Background Replacement.
It will take a few moments for the AI to analyze the image and to open the AI Background Replacement window.
3 Review the red overlay that appears on the background areas. If you need to fine-tune the selection, in the Brush Mode area, choose any of the following:
• Refine — lets you drag along the edge of the selection to create a more precise result and lets you include complex edge detail, such as fly-away hair
• Feather — lets you soften edge areas
• Add to Subject — removes the red overlay from the subject
• Remove from Subject — adds the red overlay to areas that you want to identify as background
4 Adjust the Brush Size slider, and drag in the preview area, changing brush modes as needed to get the result you want.
If you want to adjust the brush size interactively, hold down Alt while dragging in the preview window.
For information about all the available controls, see Fine-tuning a selection with the Refine Brush.
5 When you are satisfied with the selection, click Next.
6 In the Select from area, choose one of the following options:
• Preset — choose a category from the drop-list and click a thumbnail to apply a new background from a selection of included images
• Custom — click the Browse button and navigate to the image that you want to use as a background
• Original — does not change the background, but creates two new layers when you output: a layer with the subject and a layer with the background
• Transparent — removes the background content and outputs the subject as a layer with a transparent background
If you choose a Preset or Custom background, you can use the Scale slider (below the preview window) to resize the background and you can drag in the preview window to reposition the background.
7 Click Done.
You can switch between the Add to Subject and Remove from Subject brush modes by right-clicking as you drag.