Using and creating presets
Presets are scripts that define the behavior, properties, or settings of a dialog box or tool. Many dialog boxes and tools come with predefined, ready–to–use presets; however, you can also design and save your own presets. This is useful if you frequently use the same settings in a dialog box or with a tool. By using presets, you can save the settings and they'll appear in the Presets drop-list associated with that dialog box or tool.
To choose a preset

•
In the
Presets drop-list, select the desired preset from the list.
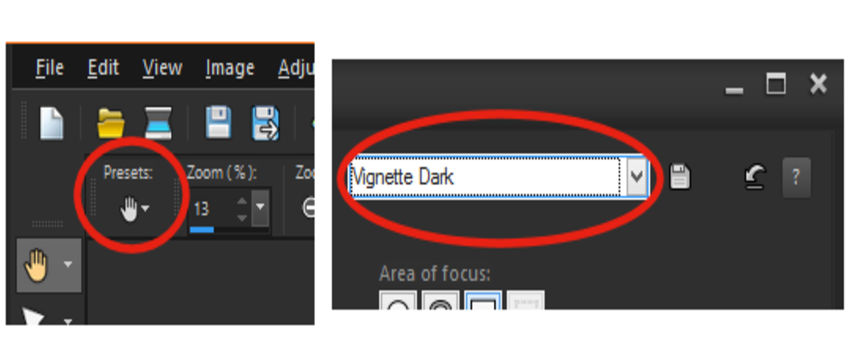
On the left is the Pan tool’s Presets drop-list button in the Tool Options palette, and on the right the Presets drop-list in a dialog box.
To reset values to default settings

•
In the
Presets drop-list, click the
Reset to default button

.

To reset a dialog box to the settings that displayed when you opened the dialog box, hold down Shift and click the Reset to default button.
To save settings as a preset

1
Modify the settings in the dialog box or the Tool Options palette.
2
Click the
Save preset button

to display the Save Preset dialog box.
3
Type a name for the preset.
Note: You cannot use "Default" or "Last Used" as the name for a preset.
If you want to enter additional preset information, click
Options, and type text in the
Author,
Copyright, and
Description fields.

The Preset includes group box shows the data saved with a preset.
To edit a preset

1
Modify the settings in the dialog box or the Tool Options palette.
2
Click the
Save Preset button

.
3
Type the same preset name in the preset name box.
If you want to omit any data from the
Preset includes group box, click the
Include/Exclude button

associated with the data.
A white "X" appears over the button associated with the item.
To delete a preset

1
In the
Presets drop-list, click the
Resource Manager button

.
2
In the Resource Manager dialog box, select the preset you want to delete.
