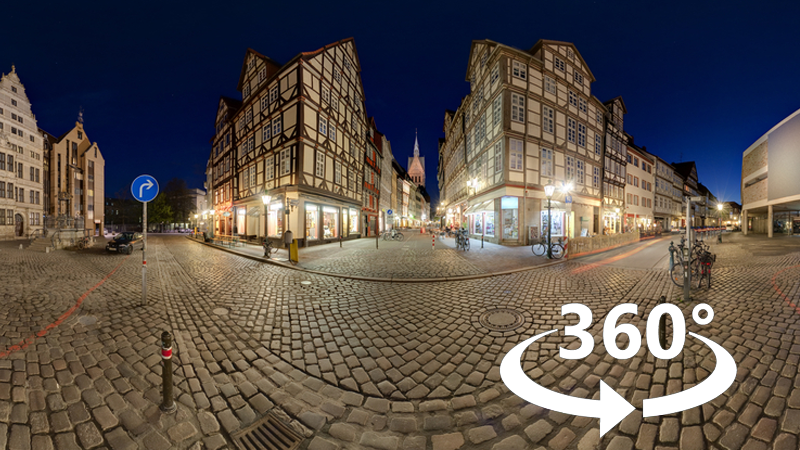
360 video
360 video is an interactive type of video that lets the viewer look in any direction by changing the viewing angle during playback. The viewing angle can be controlled by using a touchscreen, onscreen controls, or by moving the viewing device, such as a smartphone or tablet, in different directions. 360 video requires a special 360 video player (for example, YouTube and Facebook have 360 video players).
Editing 360 video
VideoStudio lets you edit different types of 360 video footage (check the instructions for your 360 video camera for more information). For example, you can adjust the color or brightness of the video, trim the video, or add titles or objects. Please note that not all effects can be applied to 360 videos.
Note: There are different types of 360 video. VideoStudio supports the following types of 360 video:
• Monoscopic Equirectangular
• Single Fisheye
• Double Fisheye
You can convert any supported 360 video to Standard, or convert Single Fisheye or Double Fisheye to Equirectangular video.
Why convert 360 video to standard video?
Here are a few reasons people choose to convert 360 video:
• There are occasions when you want to control what users look at in 360 video footage. When you convert to standard video in VideoStudio, you can use your 360 video source in much the same way that you can use multicamera sources—you can choose the view for your audience with key frame precision.
• You can play standard video using a wider range of applications and devices—no special player is required (the video is not interactive).
• Standard video is a much smaller file size than 360 video.
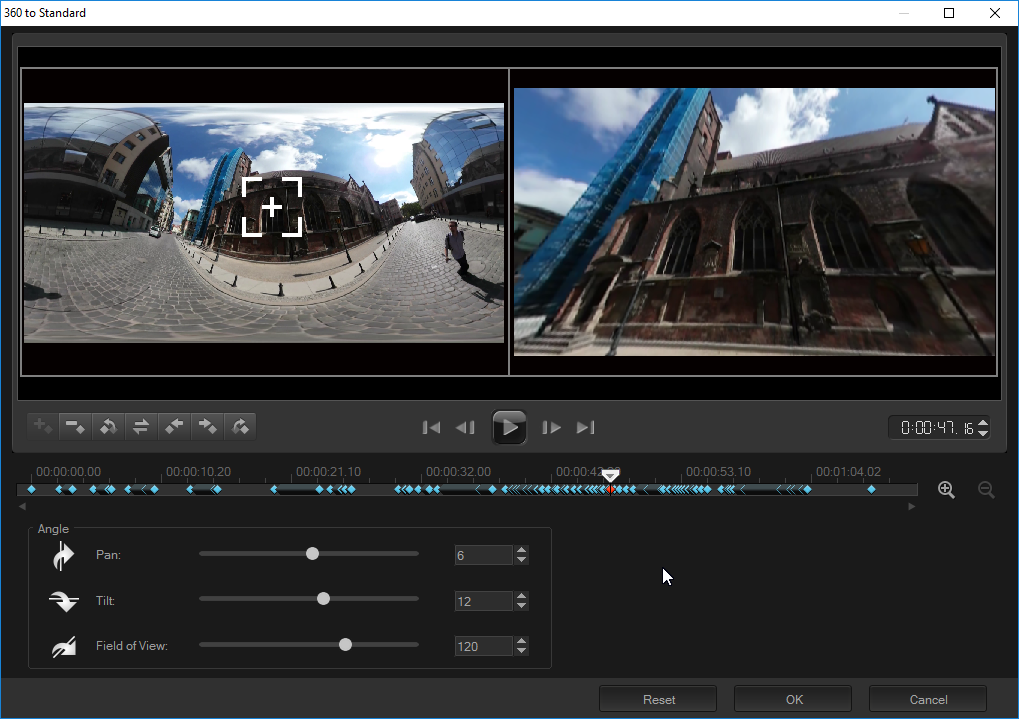
The 360 to Standard dialog box. The 360 video source displays on the left and a standard video preview displays on the right
Controls and settings
The following controls and settings can be found in the 360 to Standard and Insert as 360 windows.
• The key frame controls

let you modify the key frames on the timeline, according to the position of the scrubber. You can
Add key frame,
Remove key frame,
Go to previous key frame,
Reverse key frames,
Move key frame to the left,
Move key frame to the right, and
Go to next key frame).
• The playback bar

let you navigate your clip (
Home,
Previous Frame,
Play,
Next Frame,
End)
• Timecode 
lets you jump directly to a part of your selected clip by specifying the exact timecode.
• Scrubber 
let you scrub through the clip. Clicking a key frame will move the scrubber to the current position in the timeline.
• The
timeline 
in the
360 to Standard dialog box is a simple bar with time indicators. It contains any key frames you set and can be navigated with the scrubber. You can use the
Zoom in and
Zoom out buttons to the right of the timeline to expand or condense the units of time.
• Pan — Lets you adjust the view horizontally (x-axis)
• Tilt — Lets you adjust the view vertically (y-axis)
• Field of View — Lets you adjust the how close or how far away the camera appears to be from the scene in the selected view—the effect is similar to zooming. Lower values zoom in for a narrower view; higher values zoom out for a wider view.
To edit and export a 360 video
1 In the Edit workspace, drag a 360 video from the Library to the Timeline.
If you want to convert fisheye 360 to equirectangular, right-click the clip in the Timeline, choose 360 Video, and click the applicable fisheye option (Single Fisheye to Equirectangular or Double Fisheye to Equirectangular. If you want to adjust any conversion settings, adjust the controls and click OK.
2 In the Timeline, verify that you are working with a 360 video by ensuring that the 360 video icon

displays in the Player panel.
3 Edit the video in VideoStudio. For example, you can do the following:
• Open the Options panel to access Correction settings
• Apply an effect from the Library (*Not all effects can be applied to 360 video.)
• Trim the video
• Add a title or object
Note: When you apply a title or object to a 360 video, right-click the item in the Timeline, and choose 360 Video > Insert as 360 to convert the media to 360. Make any adjustments you want in the Insert as 360 window. A circular 360 icon appears on titles and other objects inserted as 360.
4 When you are finished editing, save your file and click the Share tab.
5 From the Share tab, ensure that you enable the Same as Project Settings check box or select a 360-compatible setting (for example, MPEG-4, AVC 360, in the highest resolution suitable for your project).
6 Make any additional changes to the settings on the Sharing page and click Start.
To convert 360 video to standard video
1 In the Timeline, right-click a 360 video clip, and choose 360 Video > 360 to Standard.
The 360 Video window opens with two preview panes—the 360 video source is on the left and a standard video preview is on the right.
2 In the 360 video pane, drag the
View Tracker icon

until its position corresponds to the view that you want to show in the standard video pane.
3 Click Play and as the 360 video plays, drag the View Tracker if you want to change the view seen in the standard video pane.
Each time you change the view, key frames are added.
Key frames appear as blue diamonds along the timeline. The selected key frame is red. Key frame buttons (standard key frame controls) appear above the timeline.
4 When you are finished, you can replay the video and edit the view by doing any of the following:
• Delete a key frame by clicking it on the timeline and pressing Delete.
• Drag a key frame on the timeline to change when the view appears.
• Click a key frame and change the view by adjusting the Pan, Tilt, and Field of View values in the Angle area.
5 Click OK to accept the changes and return to the Timeline.
If you want to clear all key frames, click the Reset button.
6 When you want to output your project, ensure that you choose a standard video format.


 let you modify the key frames on the timeline, according to the position of the scrubber. You can Add key frame, Remove key frame, Go to previous key frame, Reverse key frames, Move key frame to the left, Move key frame to the right, and Go to next key frame).
 let you navigate your clip (Home, Previous Frame, Play, Next Frame, End)
 lets you jump directly to a part of your selected clip by specifying the exact timecode.
 let you scrub through the clip. Clicking a key frame will move the scrubber to the current position in the timeline.
 in the 360 to Standard dialog box is a simple bar with time indicators. It contains any key frames you set and can be navigated with the scrubber. You can use the Zoom in and Zoom out buttons to the right of the timeline to expand or condense the units of time.