3D Title Editor workspace
The 3D Title Editor window consists of the following components:
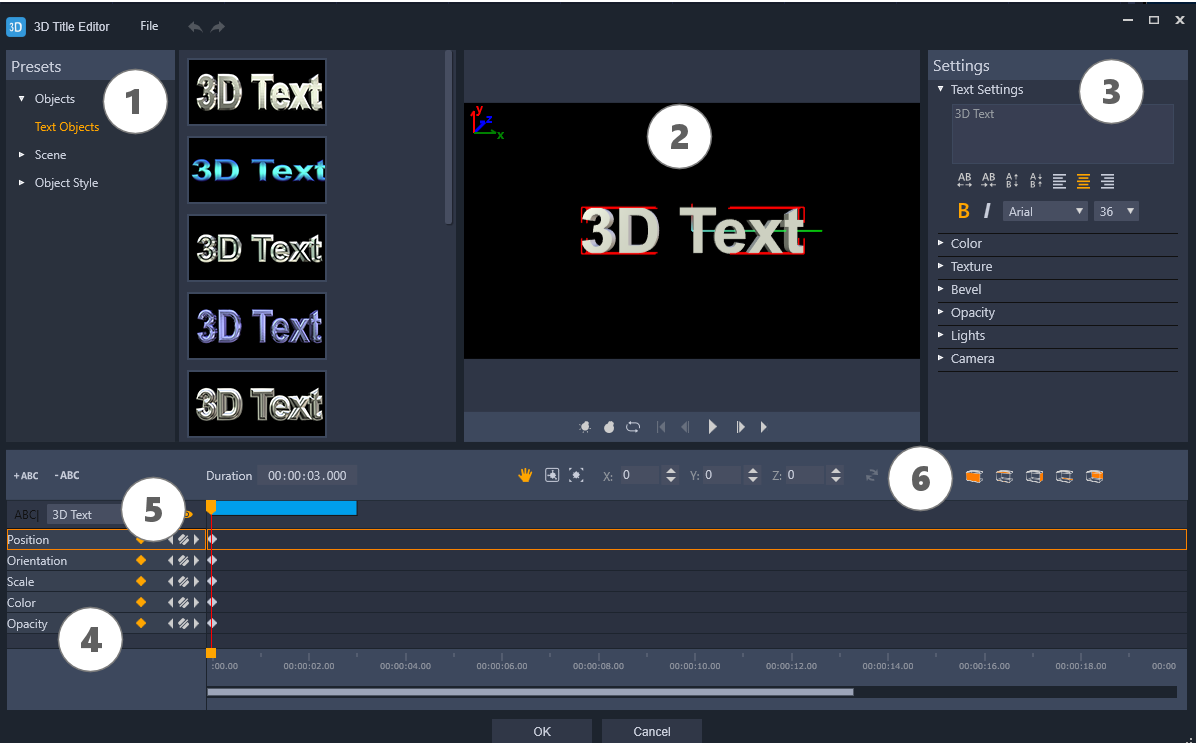
Areas of the 3D Title Editor: 1. Presets panel; 2. Player panel; 3. Settings panel; 4. Timeline panel; 5. Object List (Layers); 6. Timeline toolbar
1 Presets panel: Lets you get started quickly with ready-made Text Objects and styles, including lighting, camera, and material options.
2 Player panel: Lets you view your 3D text and work interactively with it to set position, orientation, and more. Use the playback controls to preview your 3D title.
3 Settings panel: Customize your text by choosing settings for Text, Color, Texture, Bevel, Opacity, Lights, and more.
4 Timeline panel: Lets you add, edit, and remove keyframes for the text object properties. You can also add and delete text object layers, access the Object List, and use the tools and controls on the Timeline toolbar. The scrubber in the Timeline panel is synchronized with the Player panel.
5 Object List: If you have multiple text objects in your project (separate words or letters, for example), you can choose which object you want to display in the Timeline by using the Object List drop-down menu above the key frame headers. The name of the layer is determined by the text that you type in the Text Settings box.
6 Timeline toolbar: Lets you type specific values for key frames and switch between Move, Rotate, and Resize modes. You can also add or delete text object layers from the timeline (buttons on the left side) and control which surfaces of the object are affected by surface-related settings (such as color and material).