Creating and editing 3D titles
Here are the basic steps for creating a 3D title:
1 Choose a preset text object or work with the default text object.
2 Modify the settings for the text object to get the look you want.
3 In the Timeline panel, start setting keyframes so you can apply changes to the style and movement of the text.
4 Preview your project in the Player panel, adjusting settings and keyframes to get the effect you want.
5 Click OK to return to the main application, where your 3D title appears on the timeline.
Experimenting is a good way to learn what is possible in terms of text styles and movements.
1 In VideoStudio, do one of the following:
• Click the 3D Title Editor button  in the timeline toolbar.
in the timeline toolbar.• In the Library panel, choose the Title > 3D Title category, drag a title to the timeline, and double-click it.
• Double-click an existing 3D title in the Timeline.
The 3D Title Editor opens.
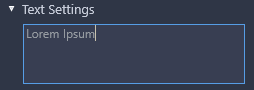
2 In the Settings panel, replace the default text by typing your text in the Text Settings box.
If you want to have more than one text object (so you can apply different properties to letters or words), in the Presets panel, choose Objects > Text Objects, and click a preset thumbnail for each object that you want to add, using the Text Settings box to type the final text for each object. At any point, you can select a specific text object for editing by clicking the object in the Player panel.
3 In Text Settings area of the Settings panel, format the text by using any of the spacing, alignment, font, and size options.
4 To determine the properties for your title in the starting position, in the Timeline panel, click the name of the property that you want to adjust and do one of the following:
• For Position, Orientation (Rotate), and Scale (Resize), drag in the Player panel or for precise settings, type values in the X, Y, and Z boxes on the Timeline toolbar.
• For Color and Opacity, in the Settings panel, adjust the settings in the Color and Opacity areas.
• For Line Space and Character Space, click the character and line spacing buttons in the Text Settings area  .
.
.If you want to adjust the Texture, Bevel, Lights, or Camera settings for the title, adjust the settings in the corresponding area or in the Presets panel, choose presets from Scene and Object Style. These settings do not have keyframes.
5 In the Timeline panel, set any additional keyframes (for example your end point keyframes), and set the properties you want for each keyframe.
If you simply have a start and end keyframe, a gradual change is applied between the two keyframes. Set more frequent keyframes for faster changes.
6 Use the playback controls in the Player panel to preview your 3D title.
7 When you are finished editing your 3D title, click OK to close the 3D Title Editor window. Your title is inserted in the Timeline (Title track).
You can apply different surface-related settings, such as color and material, to selected surfaces. For example, you can apply blue to the front face, green to the back face, and a wood grain material to the sides. Click any of the following buttons to select or deselect the corresponding surface:
•  Select front face
Select front face•  Select front bevel face
Select front bevel face•  Select side face
Select side face•  Select back bevel face
Select back bevel face•  Select back face
Select back faceYou can copy and paste keyframes for individual properties. On the Timeline, right-click a keyframe and from the context menu, choose Copy keyframe. Move to a new position along the Timeline, right-click, and from the context menu, choose Paste keyframe.
When rotating (adjusting Orientation), you can press Ctrl while dragging the text in the Player panel to adjust only the Z value.