Using Ripple Editing mode
Use Ripple Editing mode to maintain the original synchronization of tracks when moving, inserting, or deleting clips.
For example, if you add a 10-second clip at the beginning of the Video track, the other clips move to the right by 10 seconds. This makes editing more efficient by keeping all tracks synchronized.
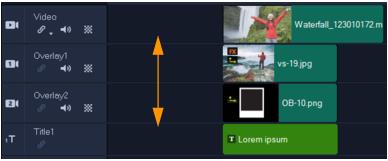
Original Timeline
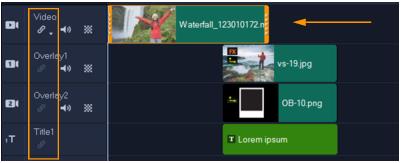
Ripple Editing off: When a clip in the Video track is moved, the other tracks remain unchanged.
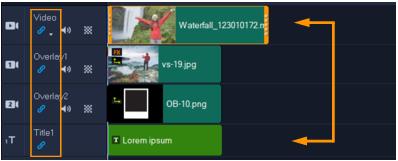
Ripple Editing on: When a clip in the Video track is moved, the clips in all other tracks that have Ripple Editing enabled are moved to maintain synchronization.
1 In the Timeline, click the Enable/Disable Ripple Editing button  in the Video track header area.
in the Video track header area.The button changes to blue when Ripple Editing is active.
2 Click the Enable/Disable Ripple Editing button  in the header of each track that you want to keep synchronized with the Video track.
in the header of each track that you want to keep synchronized with the Video track.Note: You can turn Ripple Editing mode off at any time by clicking the Enable/Disable Ripple Editing button for individual tracks, or by clicking the arrow next to the button on the Video track to open a menu that lets you Deselect All, Select All, or turn the mode on or off for individual tracks.