Using face detection in Highlight Reel
You can sort your media files by using face detection to help identify people in your photos and video clips.
If there are multiple faces in a media file, the file can be tagged with the name of each person so that the file thumbnail appears in more than one face group.
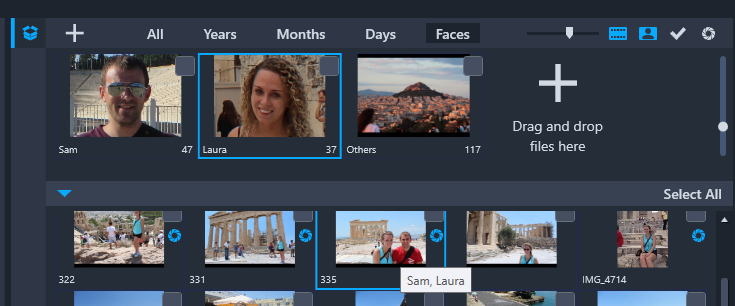
You can use Faces to sort your media. Hover over a thumbnail to see which face groups it belongs to.
1 In the Highlight Reel window, open the folder with the media files that you want to analyze.
2 At the top of the Library, click Faces.
It takes a few moments the first time you sort a media folder by Faces. Wait until the progress bar indicates that the process is finished before you continue.
3 Click any of the face groups that appear along the top edge of the Library.
4 Under a group, click Add Name, and type the name of the person identified in that group.
5 In the lower section of the Library, review all the thumbnails for this group, clicking any thumbnails that you want to view or playback in the Preview Window. If you need to remove a file from the group, right-click the thumbnail and choose Remove from this group.
6 Repeat steps 3-5 for the people you want to identify.
1 In the Highlight Reel window, open the folder with media that you have previously sorted using face detection.
2 At the top of the Library, click Faces.
3 Along the top of the Library, click any of the face groups.
4 In the lower section of the Library, select one or more thumbnails, right-click one of the selected thumbnails, and choose any of the following:
• Add to another group: Lets you add the thumbnail(s) to other groups by selecting one or more groups in the Add to Group window.
• Move to another group: Lets you move the thumbnail(s) to a different group by selecting a group in the Move to Another Group window.
• Remove from this group: Lets you remove the thumbnail(s) from the group, automatically moving the selection to the Others group.
• Delete: Removes the file from the Library.
• Delete All: Removes all the files in that folder from the Library.
If you’re not sure if a thumbnail belongs to more than one group, hover over the thumbnail until a tooltip displays—the group names it is tagged with will display here.
You can also add thumbnails to a face group by selecting the thumbnails in the lower part of the Library, and dragging them over a face group thumbnail at the top of the Library.
1 In the Highlight Reel window, open the folder with media that you have previously sorted using face detection.
2 At the top of the Library, click Faces.
3 Along the top of the Library, click a face group, and do any of the following:
• Change the group name: Click the name below the group thumbnail and type a new name.
• Delete a group: Right-click the group thumbnail and choose Remove this group.
• Merge a group: Right-click the group thumbnail, choose Merge with groups, and select a group for merging.
• Create a new group: In the lower part of the Library, select the thumbnails that you want to add to a new group, and drag them to the plus sign (Drag and drop files here) in the upper right corner of the Library. You can then select the new group, click Add Name, and type the name you want.