Creating animated GIFs
You can convert video clips to animated GIFs by using the GIF Creator. You can select a video clip from the Timeline or navigate to the file you want to convert. You can trim the selected clip to convert only the frames you want.
1 Do one of the following:
• If the clip you want to convert is open in the Timeline, select the clip.
• If you want to convert a clip that is not currently in the Timeline, ensure no items are selected in the Timeline.
2 On the Timeline property bar, click the GIF Creator button  .
.
.If you selected a clip in the Timeline, the clip appears in the GIF Creator window.
If no clip was selected, navigate to the video clip that you want to use and click Open.
3 If you want to trim the clip, use any of the standard trimming tools in the GIF Creator window. Use the playback controls to preview your changes.
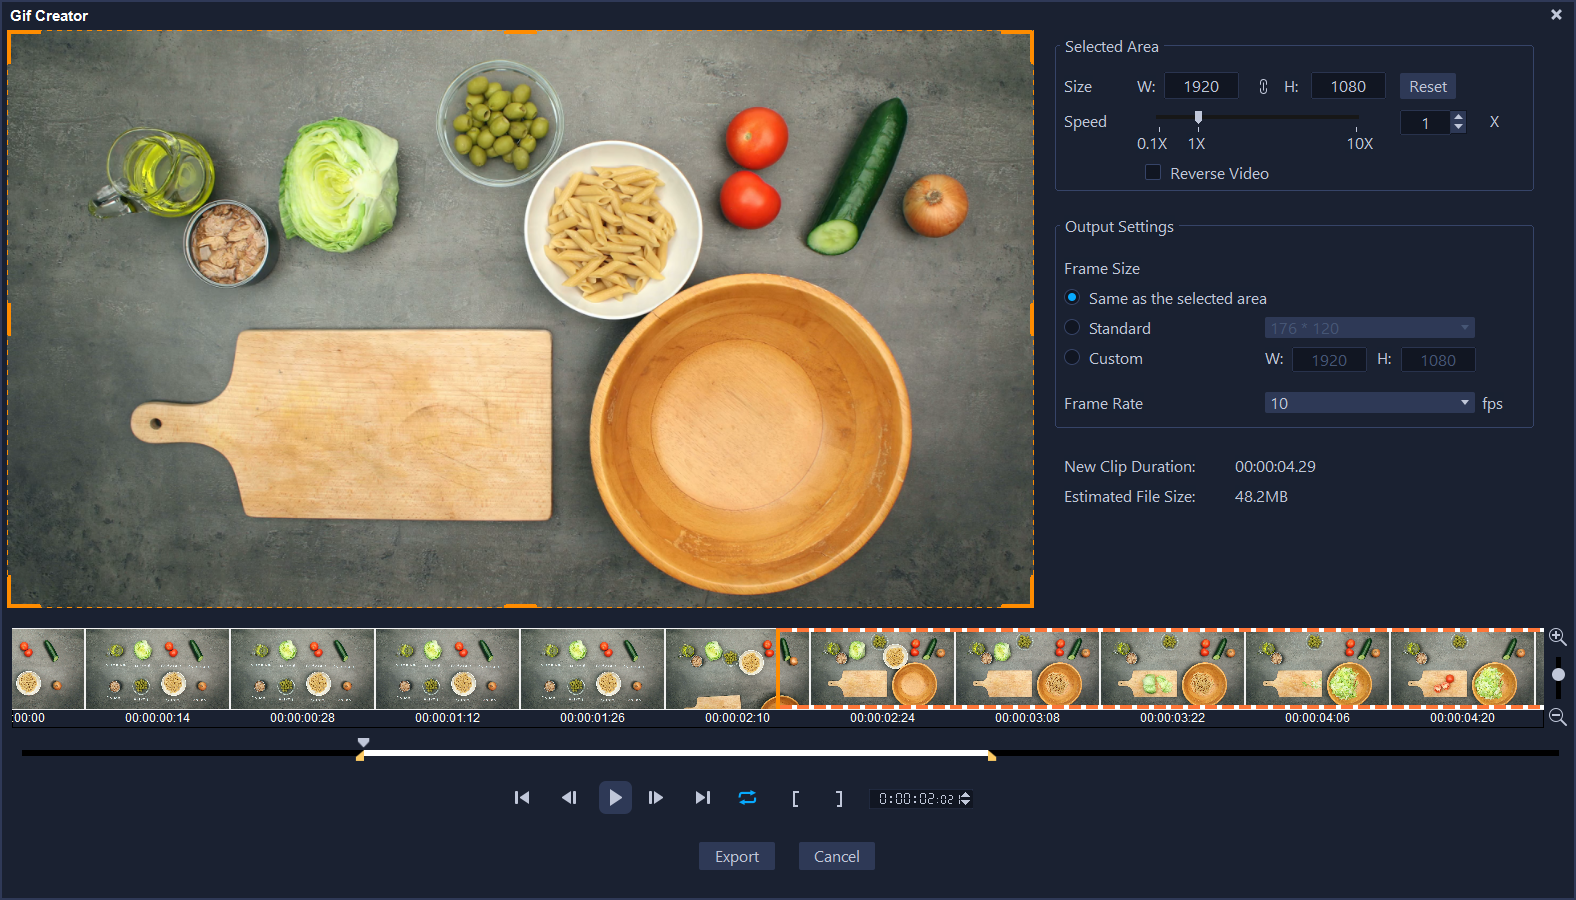
4 In the GIF Creator window, adjust any of the following settings:
• Selected area — If you want to use a specific area of the frame for your GIF, drag the orange bounding box in the preview area to enclose the area that you want to use. In the Size area, you can fine tune the dimensions by typing values.
• Speed — Set the playback speed.
• Reverse — Mark this check box to reverse the start and end of the clip (backwards).
• Frame Size — Choose from Same as selected area, Standard, or Custom, choosing values if required.
• Frame rate — Set a value for the frame rate. Higher values result in a smoother animation, but also a larger file size. Lower values result in a choppier animation and a smaller file size.
The New Clip Duration and Estimated File Size values update according to your settings.
5 Click Export to generate the animated GIF. The file is added to the Library automatically.