Adding audio files
You can add audio files to your project in one of the following ways:
•
Add audio files from the Library
The Library includes a collection of sound effects, as well as Triple Scoop and ScoreFitter royalty-free music. You can import audio files into the Library from a local or network drive.
•
Record a voice-over clip
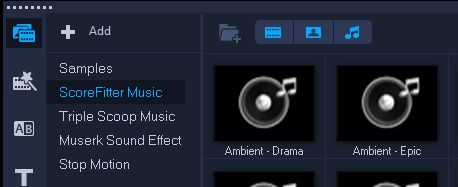
The
Auto Music feature of VideoStudio lets you easily create high-quality sound tracks from the ScoreFitter library of royalty-free music. Songs have different variations to help you set the right feel for your video production. You can also access ScoreFitter music in the Library by clicking the
ScoreFitter Music folder.
You can also extract audio from a video file. For more information, see Splitting audio tracks from video clips.
The audio icon (1) in a video clip indicates that the clip has sound.
VideoStudio lets you preview audio files in the Player panel before and after you import them into a project. For more information about previewing clips, see Using the Player panel.
In Audio View, you can preview the audio waveform. When you play a clip, drag the scrubber, or move the cursor in the Timeline, VideoStudio automatically highlights and zooms in on a sequence of 10 frames before and after the cursor to help you see the area in greater detail.
To add an audio file to a project

1
In the Library panel, click the
Sounds button

.
2
Drag an audio clip from the Library to the
Timeline.
To import an audio file into the Library
1
In the Library panel, click the
Sounds button
.
2
Click the
Import audio files 
button and browse to the folder where the audio files are stored.
To add voice-over narration
1
Move the
scrubber to the section of the video where you want to insert your voice-over.
Note: Make sure you click an empty area in the
Timeline so you don’t select an existing voice-over clip.
2
Click the
 Record/Capture Option
 button on the
Timeline toolbar and choose
Voice-over.
The
Adjust Volume dialog box appears.
3
Speak into the microphone and check if the meter responds as expected.
Tip: Use the
Windows audio mixer to adjust the level of the microphone.
4
Click
Start and begin speaking into the microphone.
5
Press
[Esc] or
[Space] to end the recording.

Recording narrations in short (10 to 15-second) sessions would make it easier to remove poor recordings and redo them later on. However, if you prefer to record everything in a single file first and then edit sections out, use silence between the voice segments. After you are done with the recording, you can easily locate the silent parts in the audio waveform by using the Preview window in the Player panel, mark the unwanted sections, and cut them out. For information about trimming and cutting audio clips, see Trimming and cutting audio clips.
If you often record voice overs, add the Voice-over button  to the Timeline toolbar for quick and easy access. Click the Customize Toolbar button
  on the Timeline toolbar, and enable the Voice-over check box.
To import music from an audio CD
1
In
Timeline view, click the
Record/Capture Option button on the
Timeline toolbar, and click
Import from audio CD.
The
Rip CD Audio dialog box appears.
2
In the
Track List, select the tracks that you want to import.
3
Click
Browse and select the folder where you want to save the files.
4
Click
Rip to start importing the audio tracks.
To add music with Auto Music
1
Click the
Auto Music button

on the
Timeline toolbar.
The
Auto Music panel opens.
2
In the
Category list, select the type of music you want.
3
In the
Song list, select a song.
4
In the
Version list, select the version of the song.
To listen to your selection, click the
Play Selected Song button

5
When you find the song you want, click the
Add to Timeline button

.
Enable the Auto Trim check box to automatically trim the audio clip or cut it down to the desired duration.