Creating animated GIFs
You can capture a section of your video and convert it to a short repeatable clip by using the GIF Creator. Animated GIFs are a great way to share highlights, over-the-top moments, and even cringe-worthy content across all online platforms. Just select the best scenes from your footage, export them to the GIF format, and easily share with anyone. Their size makes them easy to upload, email, or send over SMS. It’s the best way to feature your most unique frames in a flash.
You can export an entire VideoStudio project, select a video clip in the Timeline or Library, or browse for a file saved to a local, network, or portable device. You can trim the selected clip to convert only the frames you want.
To create an animated GIF
If you chose to export the active VideoStudio project or selected a clip in the Timeline or Library, the project or clip appears in the GIF Creator window.
If no clip or project was selected, the Open Video File dialog box appears. Browse to the drive and folder where the video clip is stored, and click Open.
3
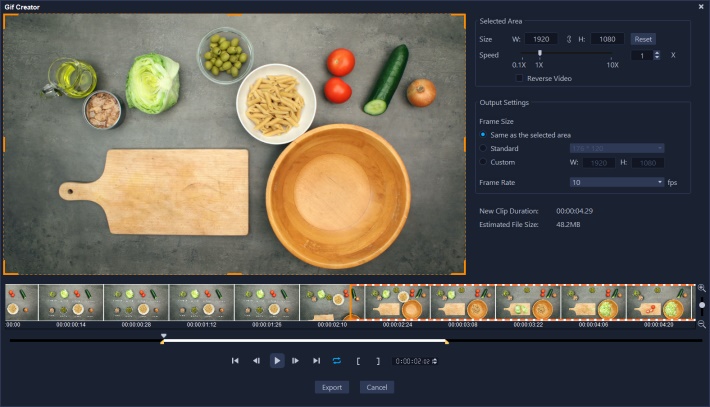
If you want to trim the clip, use any of the standard trimming tools in the GIF Creator window. Use the playback controls to preview your changes.
• Selected area — If you want to use a specific area of the frame for your GIF, drag the orange bounding box in the preview area to enclose the area that you want to use. In the Size area, you can fine tune the dimensions by typing values.