• Merge — Choose your merge settings, and if required, apply custom editing.
• HDR Adjustments — After merging your photos, you can adjust them and save the results to an editable HDR file before finalizing the merge and fine-tuning.
• Fine-Tune — Refine your image, with noise-reduction and sharpening options, along with some other familiar tools from the Adjust workspace. When you’re done, you can save to a standard file format and close Exposure Merge.
Please see the topics below for more detailed information about each step.
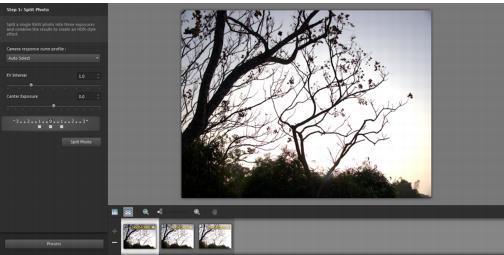
Step 1: Merge
Merge settings include:
• Camera response curve profile — applies a curve adjustment to the image, based on the known characteristics of the sensor in your camera
• Alignment — Choose between Feature-based (detects features in the photos) or Edge-based (detects edges within the photos).
• Custom editing — Choose which areas you want to keep (Brush in) or remove (Brush out) from each photo. Often, custom editing is applied to remove “ghosting” — the semitransparent effect caused by merging photos that captured moving objects.
Step 2: HDR Adjustments
After you merge your photos, you can adjust the resulting HDR image by applying a preset, customizing a preset, or creating the look you want from scratch. The key is to experiment. You can save your custom settings as a new preset. You can manage your presets by saving, loading, deleting or resetting them.
All the adjustment options in the HDR Adjustments window let you work on an HDR, 32-bit file. You can save the HDR file with all settings, so you can reopen and modify it again in the future. When you are finished with Step 2 and move to Step 3, the final step, the application prepares the image for output by saving it to a 16-bit image.
Step 3: Fine-Tune
The final step is fine-tuning the merged image before you exit Exposure Merge. The controls in the Fine-Tune window are based on the controls in the Adjust workspace. For more information, see Using the Adjust workspace.
Some fine-tuning tips:
• Digital Noise Removal is a great tool for cleaning up noise that can result from merging photos.
• High Pass Sharpen can help reduce blurred areas that may result from movement between photos.
• Smart Photo Fix and White Balance let you tweak the colors.
• To brighten the entire image, try adjusting Brightness/Contrast. To brighten only the dark areas, try Fill Light/Clarity.
• Local Tone Mapping and Fill Light/Clarity can be used to further enhance details in the image.
To choose merge options for Exposure Merge (Step 1)
1 In the Manage workspace, select the thumbnails for the photos that you want to merge.
An orange outline appears around the thumbnails of selected photos.
2 Click FileHDRExposure Merge.
3 In the Step 1: Merge window, choose a profile from the Camera response curve profile drop-list.
If you are not sure what to choose, select Auto Select.
If the EV interval slider appears, set the exposure value that you used between photos.
4 In the Alignment area, choose an alignment type from the Method drop-list.
If you want to crop any edges that don’t overlap, mark the Auto crop check box.
5 Click Align.
To see the results, enable the Preview Alignment check box (near the bottom of the panel).
The merge settings are applied and the Step 2: HDR Adjustments window appears.
If you want to tweak your merge settings, click Back to return to the Step 1 window.
HDR Exposure Merge and Photo Blend are part of the same merge utility and therefore cannot be opened simultaneously.
If your photos were not taken with a tripod or steady rest, there is likely some misalignment between shots. If the misalignment is significant, you may not be able to use the photos for HDR.
You can also add photos to or remove photos from the merge tray by clicking the Add Photos button or Remove Photos button in the tray at the bottom of the Exposure Merge window.
To brush in or brush out artifacts in Exposure Merge
1 In the tray that appears below the Step 1: Merge preview area, click a thumbnail.
2 In the Custom editing area, do any of the following:
• Click Brush in, and in the preview area, drag over the area that you want to preserve. You don't need to be exact.
• Click Brush out, and in the preview area, and drag over the area that you want to remove.
• Click Auto brush if you want the application to auto-detect and remove ghosting. Auto brush works well for removing ghosting along feature edges in photos taken without a tripod. It is not recommended for larger ghost objects, such as cars and people.
3 Repeat the process for each of the photos that you want to edit.
You can also
Change the brush size
Drag the Brush size slider.
Refine or erase brushstrokes
Click Eraser, and drag across a brushstroke in the preview area.
Remove all brushstrokes
Click Clear.
Change the color of brushstrokes
Click the arrow beside the Brush in or Brush out color swatch and click a new color.
Hide or display brushstrokes in the preview area
Mark or unmark the Show brushstrokes check box.
To adjust HDR images in Exposure Merge (Step 2)
1 In the Step 2: HDR Adjustments window, do any of the following to achieve the look you want.
• In the Presets area, click a preset thumbnail.
• Mark the White Balance check box, click Auto or click the Dropper tool , and click the image to set the white point. Drag the Temperature slider to warm or cool the colors in the image and drag the Tint slider to fine-tune the color.
• Drag the Contrast, Highlights, Midtones, and Shadows sliders to adjust the overall tone and contrast.
• Drag the Vibrancy slider to saturate or desaturate the colors.
• From the Detail drop-list, choose Natural detail or Creative detail, and drag the respective sliders to adjust the amount of local detail.
If you want to focus on black-and-white processing, click the B&W tab below the presets area. To re-enable color processing, click the Color tab.
2 To save your HDR image for further editing, click Create HDR file, navigate to the folder you want, type a file name, and click Save.
This saves the image content. You can also save your adjustments as a preset.
3 Click Process.
The settings are applied to the image and it is saved as a 16-bit file in preparation for the final output. The Step 3: Fine-Tune window appears.
To manage presets in Exposure Merge
• In the Presets area of the Step 2: HDR Adjustments window, perform a task from the following table.
To
Do the following
Save your adjustments as a preset
Click the Save Preset button , and type a name in the Save Preset dialog box. A thumbnail is added to the preset area.
Import a preset file
Click the Preset Options button , click Load, and navigate to the file.
Delete a preset
Click the thumbnail for the preset, click the Preset Options button, and click Delete.
Restore the default presets list
Click the Preset Options button and click Reset. Click Yes in the confirmation dialog box. All custom presets are deleted.
Hide or display presets
Click the arrow on the Presets bar.
To fine-tune and save an HDR-processed image (Step 3)
1 In the Step 3: Fine-Tune window, apply any of the tools or adjustment options to adjust the final image.
2 Do one of the following:
• Click Edit to open the file in the Edit workspace if you want to continue editing the photo. The Exposure Merge window remains open.
• Click Save and close to save the file, close Exposure Merge, and return to the workspace you were last using.
When the size of a zoomed-in image exceeds that of the preview area, you can click the Pan tool and move the rectangle to choose a preview area.
 , click Load, and navigate to the file.
 and move the rectangle to choose a preview area.