Completing a typical task
Each task is a little different. Some are incredibly simple. Others take a little time to master. To help you get started, let’s walk though one of the most useful projects—creating a disc that contains files copied from your computer.
1 Open Easy CD and DVD Burning by double-clicking the icon that was placed on your computer desktop during installation. In most cases, the main Roxio Home window opens with the Home category selected. It looks something like this:
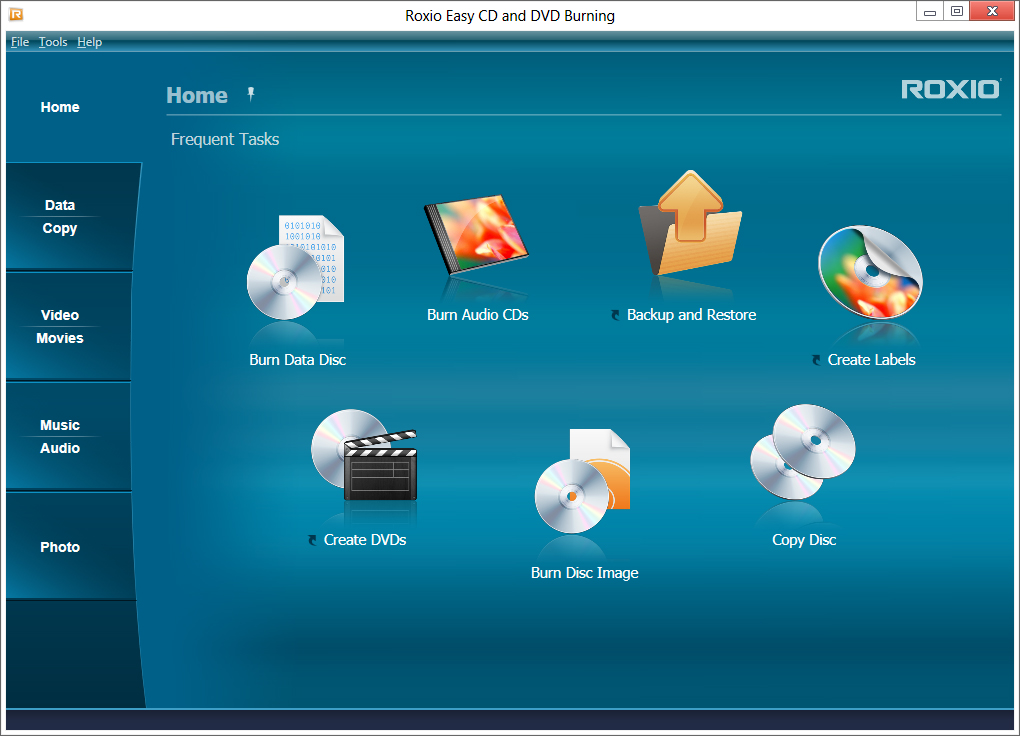
The Home window includes links to frequently used tasks.
On the left side of the window, you will see the names of several project categories. Since we are going to be making a data disc, click the Data/Copy category.
The application window changes and displays a set of tasks that are related to protecting or copying the valuable files stored on your computer.
2 When you are ready, click Burn Data Disc.
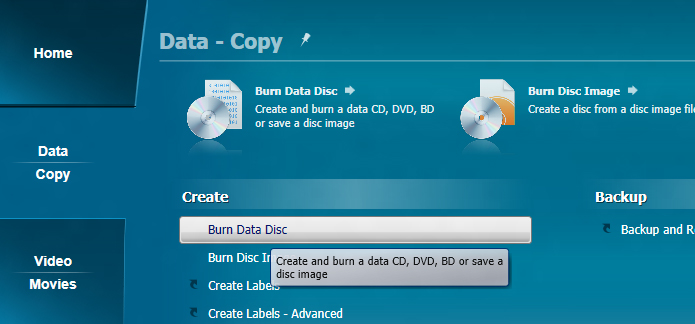
The Burn Data Disc project link in the Data - Copy window
In the illustration above, a link for the Burn Data Disc project appears in the suggested projects area near the top of the window and again in the Create section.
After clicking either link, the application window changes again. It now displays everything you need to set up your project and burn a disc.
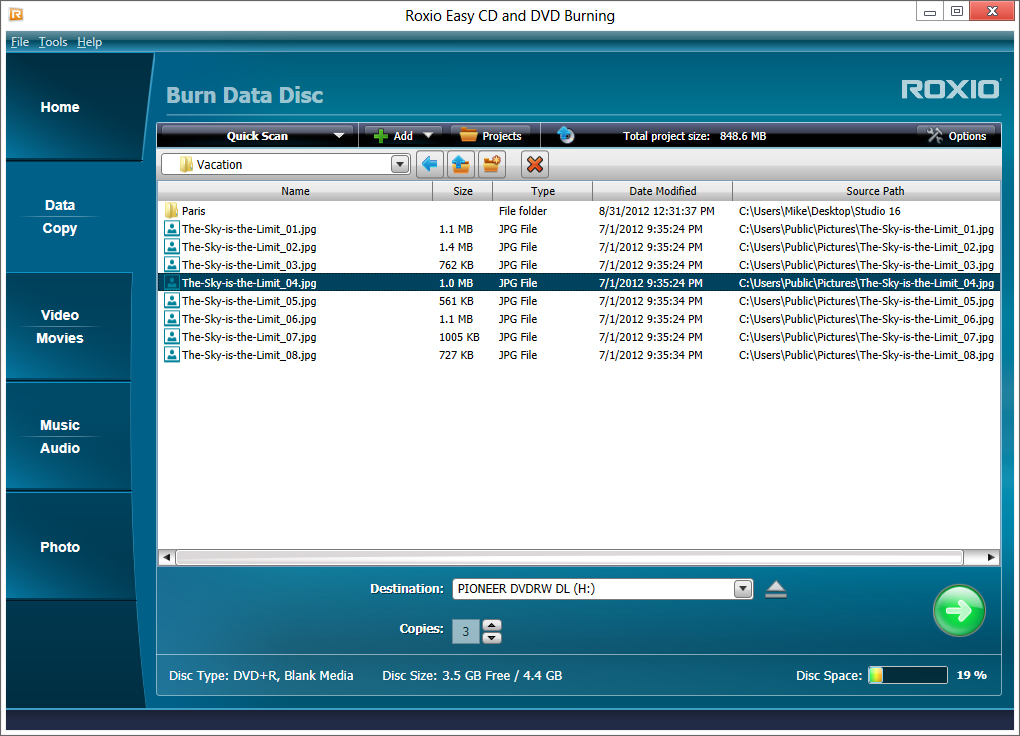
Burn Data Disc project window with files added.
As you can see, the Burn Data Disc project is built into the main Creator application window, which we call Roxio Home. Some projects are built into Roxio Home; others open in a separate window. Many components that open in separate windows have names you may know: MyDVD, VideoWave, CinePlayer. They are all part of your Creator suite.
3 To begin a data disc project, insert a blank CD, DVD, or Blu-ray Disc into your computer’s disc drive. (The project also allows you to add files to an existing data disc, but to keep things simple for this project, use a blank disc.)
4 Use the Destination drop-down menu to select the drive holding your blank disc. If your computer only has one disc drive, it is selected automatically.

Click the Destination menu and choose from the list of available drives.
5 Now you are going to add files to the project.
Click the Add button located near the top of the Burn Data Disc project window. Choose Files or Folder from the submenu.
A dialog window opens. Use it to select the files or folders you would like to add.
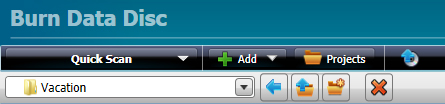
Use the toolbars to open the Quick Scan panel, add files, open saved projects, and delete files from a project.
6 Near the Add button on the project window toolbar is the Name Your Disc text box. Enter a name for your disc, so it will be easy to recognize the next time you use it.
While you are using the project toolbars, notice that they include some other useful features:
n The retractable Quick Scan panel makes it easy to select files by category.
n To the right of the Add button is the Projects button that you can use to easily find saved projects.
n Next to that is the Make Bootable button. Use it to create a bootable disc that can be used to start your computer if something should ever go wrong with the Windows operating system.
Before burning your data disc, look along the bottom of the project window. Here you can find several project status indicators. The information presented varies from project to project and is updated when you change discs or destination drives.

Project information is displayed along the bottom of the window.
In this case, the indicator shows the project size, the type of disc in the drive, and the available disc space.
7 Now you are ready to burn a disc. To begin, click the large green button on the bottom right corner of the project window. A progress indicator appears, and your files are copied onto the disc.
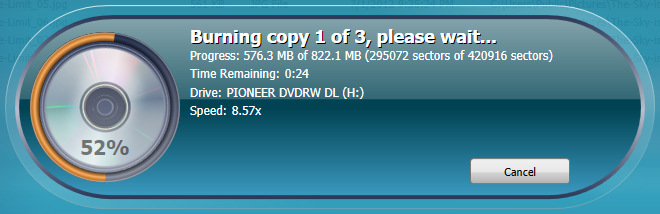
The progress indicator shows a burn in progress.
You don’t have to wait for this project to finish before starting one of the other projects in Roxio Creator. But you can only have one project of each type running at a time.
When the project is finished, remove your disc and click Finish. If you would like to save this project so the same file set can be easily burned in the future, click the File menu and choose Save.