Making an MP3 disc from files on your computer
To make an MP3 disc from files:
1 Select the Music - Audio project category.
A list of projects is displayed.
2 Click on the Burn MP3 CDs project name.
A Burn MP3 CDs project opens in the project window.

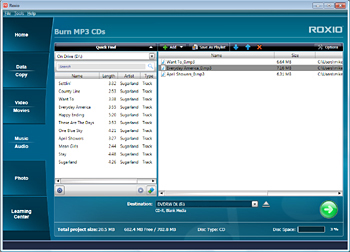
The Burn MP3 CDs project window
3 Click on the Add button to begin adding files or folders to your project. You can also add compatible music files by dragging them from the Quick Find panel or any Windows directory onto the project window.
4 Arrange the song order in the project window by selecting a song and clicking on the Move Up or Move Down arrows  .
.
 .
.5 Make sure a blank or rewritable disc is in your recorder drive.
6 Check the media information display at the bottom of the project window to confirm that the songs will fit on your disc. If the songs will not fit, click one or more song titles then click the Remove button  .
.
 .
.Note: Clicking the Remove button deletes the highlighted song from your list but does not affect any files on your hard drive.
7 To begin recording your disc, click the action button  .
.
 .
.8 A progress indicator appears, and your disc is recorded.
9 Once the disc has been burned, click the Finish button to return to the project window.
10 To save this project so the same file set can be easily selected in the future, select Save from the File menu.
11 To save this project as a playlist, click the Save As Playlist button. Select a name and destination for the file, and click the Save button. This saves the file set as an M3U playlist file.