When you edit a mask, you change either its area or the degree of masking. For example, painting over an object to mask it changes the area, whereas applying a gradient fill changes the degree of masking.
You can invert the transparency of a mask, so that black pixels become white, white pixels become black, and shades of gray become their mirror value, which is the maximum value (255) minus the current value.
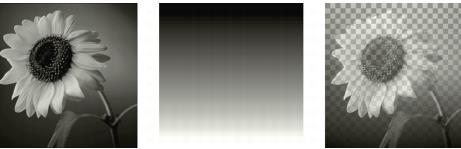
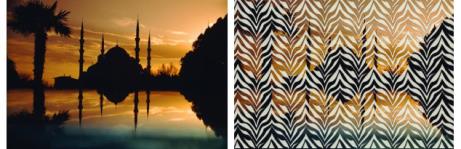
You can use a gradient, pattern, or texture mask to create interesting effects. A gradient mask varies the opacity of an image from fully hidden to fully transparent by fading the image in or out. A pattern or texture mask varies the image opacity in a repeated pattern throughout the image.
Using a gradient mask
Using a pattern mask
You can edit the layer properties of a mask, such as the name, visibility, or opacity. For more information, see Working with layers.
To invert a mask
Edit workspace
1 On the Layers palette, click a mask layer.
2 Choose LayersInvert Mask/Adjustment.
To create a gradient, pattern, or texture mask
Edit workspace
1 Create a new mask.
2 Click the Highlight mask area button on the Layers palette to display the mask overlay.
3 On the Tools toolbar, click the Flood Fill tool .
If you want to fill all pixels in the mask, set the Match mode control on the Tool Options palette to None.
4 On the Materials palette, choose a gradient, texture, or pattern.
5 Click the mask to apply the foreground material; right-click the mask to apply the background material.
For information about creating masks, see Creating masks.