Using Quick Find
The Quick Find panel offers the easiest way to scan your hard drive for audio files, sort them into categories, and add them to your projects.
To set or change your scan settings:
1 Click the Settings button at the bottom of the panel. The Monitored Folder Settings dialog box opens.
2 Use the controls on the dialog box to select the folders to be monitored.
3 Click the OK button. The folders you have selected will be regularly scanned for audio files. The results of each scan will appear in the Quick Find panel.

The Settings button is shown here in the lower left corner.
The first scan can take several minutes, depending on the size of your hard drive.
Tip: You have the option to skip short music files when scanning your hard drive for music. Click Options > Quick Find and set the Scan for Music option to the desired number of seconds.
To sort files in the Quick Find panel:
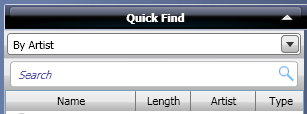
Once all the valid music files on your system are displayed, you can sort them by selecting a category from the Quick Find drop-down menu. To view the songs on a disc, insert the disc into your disc drive and select On Drive from the drop-down menu.

Click the Quick Find drop-down menu to sort files. In this example, the By Artist category is selected.
To add files to the project window:
1 Select the files, folders, or playlists you wish to add from the Quick Find panel, and click the Add button at the bottom of the panel.
The selected files move to the project window.
Click one of the links below to continue: